“This tutorial covers deploying a “Hello World” smart contract on ZenChain using Remix IDE and staking ZTC tokens.”
Deploy a Smart Contract
Smart Contracts
Smart contracts are self-executing programs stored on a blockchain. They run automatically when predefined conditions are met, enabling secure and transparent transactions without the need for intermediaries. Smart contracts are widely used in applications like finance, supply chain, and digital identity.
Prerequisites & Considerations
– Ethereum Wallet: Ensure you have MetaMask or another browser-based Ethereum wallet installed and ready to use.
– ZenChain Network Details: Your Ethereum wallet must be connected to the ZenChain Testnet.
– Gas Fees: You’ll need ZenChain native tokens to cover gas fees for deployment and interaction. Obtain testnet ZCX tokens from the ZenChain faucet at https://faucet.zenchain.io.
Step by Step
1️⃣ Set Up Remix IDE
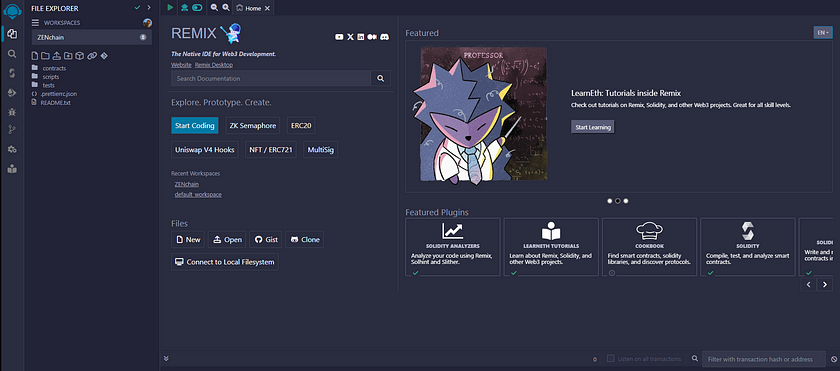
Access Remix IDE in your web browser: https://remix.ethereum.org/
2️⃣ Create the Smart Contractc
- In the left-hand file explorer pane, create a new file named
HelloWorld.sol. - Paste the following Solidity code into the file:
pragma solidity ^0.8.0;

contract HelloWorld {
    string public message;

    constructor() {
        message = "Hello, World!";
    }
}
3️⃣ Compile the Smart Contract
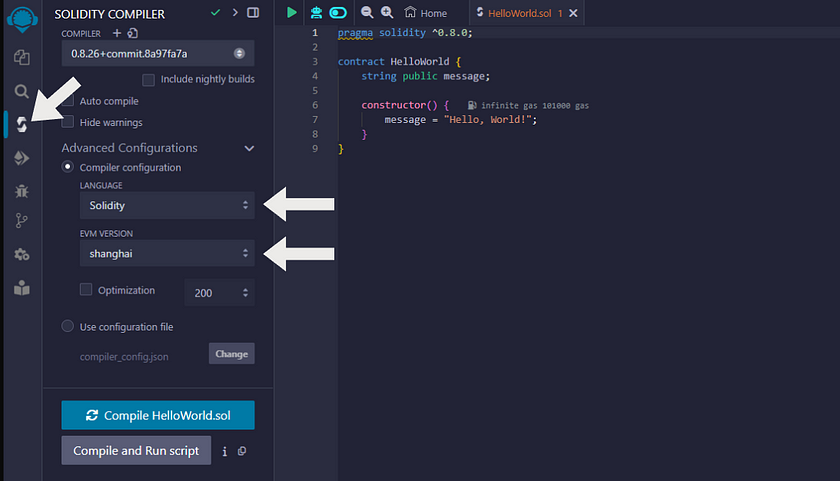
- In the Remix file explorer, select the
HelloWorld.solfile from the sidebar on the left. - Click the “Solidity Compiler” icon in the left-hand sidebar.
- Expand the “Advanced Configuration” section and ensure the EVM version is set to “Shanghai”.
- Click “Compile HelloWorld.sol”.
4️⃣ Deploy the Smart Contract
- Ensure your Ethereum wallet is connected to the ZenChain network.
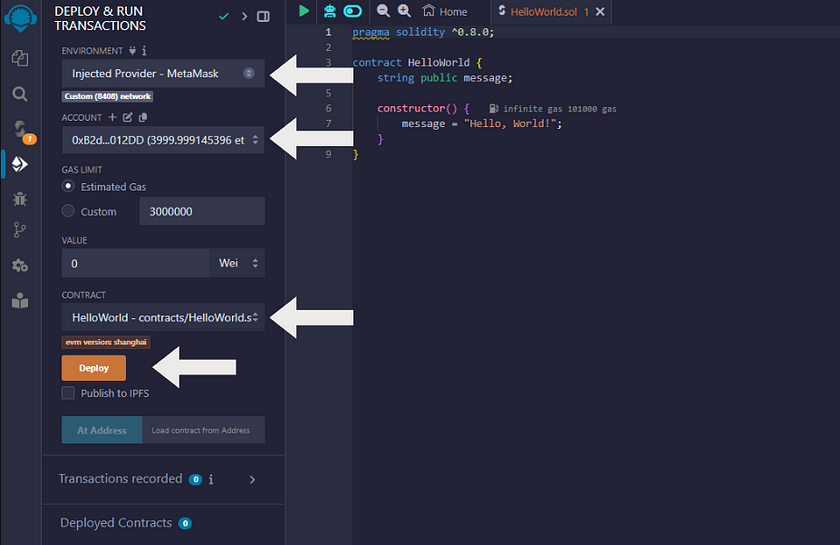
- In the left-hand sidebar, click the “Deploy & Run Transactions” plugin icon (shaped like an Ethereum diamond).
- Under “Environment”, choose “Injected Provider”.
- From the “Contract” dropdown, select your compiled contract,
HelloWorld. - Click “Deploy” and confirm the transaction in your wallet if prompted.
5️⃣Interact with the Smart Contract
- Once deployed, your contract will appear under “Deployed/Unpinned Contracts” section of the “Deploy & Run Transactions” pane.
- Expand it to see the
messagevariable. - Click the blue “message” button to read the stored message. It should display “Hello, World!” in the Remix console.


Stake with ZenChain Station
ZenChain Station is an intuitive dApp designed to make staking ZCX tokens or running your own ZenChain node effortless. With ZenChain Station, you can maximize your rewards while contributing to the network’s security and performance. Follow this guide to get started in just a few steps.
1️⃣ Connect Your Wallet
- Head over to https://node.zenchain.io.
- Click the “Connect Wallet” button in the top-right corner and link your Ethereum wallet.
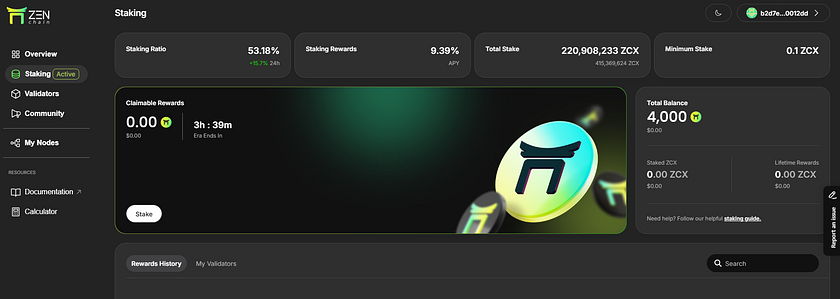
- Once connected, navigate to the “Staking” page to begin.
2️⃣ Stake ZCX
- On the staking page, click “Stake” to open the staking modal.
3️⃣ Set Your Preferences
- Decide where your staking rewards should go.
- Pick a nomination strategy.
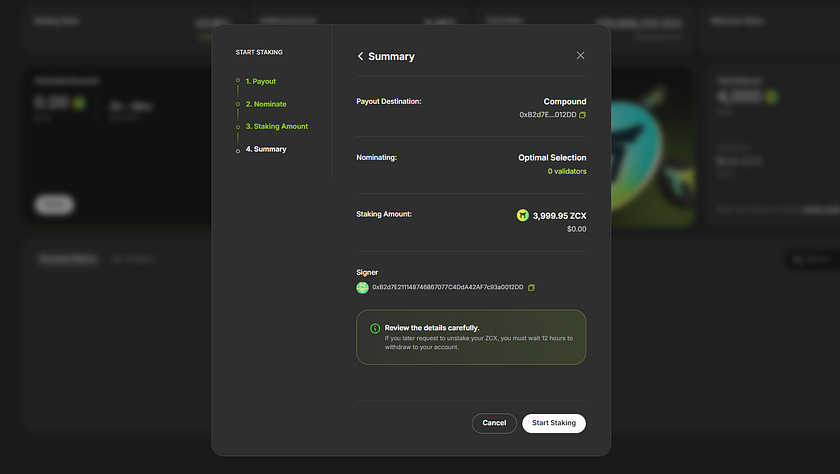
- Enter how much ZCX you want to stake. The more you stake, the higher your potential rewards.
- Take a moment to review your settings in the summary. If everything looks good, move on to the next step. (Check Validators)
- Click “Start Staking” to send the transaction to your wallet for approval. Once you sign it, you’ll officially be staking!
4️⃣ Claim Rewards
To claim your rewards, go to the staking page and click “Claim.”

Leave a Reply